This post is one in the same series elaborating the how to digitally sign your assemblies. I am not going to spend my time explain why digitally sign the assembly because there are tons of articles explaining it ( I might do the same sometime in future).
I am putting the screen shot of the effect before and after digitally signing the assembly
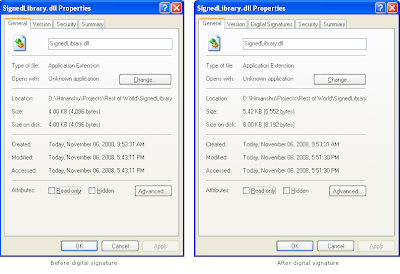 See there is a new Digital Signature tab which tells about the details of the publisher of this particular assembly.
These are steps that you need to do digitally sign the assembly.
makecert -sv SignedLibrary.pvk -n "CN=Himanshu Rastogi Pvt Ltd" SignedLibrary.cercert2spc SignedLibrary.cer SignedLibrary.spc
signtool signwizard
The final command will open the wizard which will help you signing the assembly. It is pretty simple but in case you think you are facing some issues or have some confusion please write back to me at hrastogi@gmail.com .
 Based on the command issued these tools help you do what you on the left hand side that is basically digitally signing the assembly. Things to remember here are that makecert.exe and cert2spc.exe are the tools that are shipped with .Net SDK and they are available merely for testing purpose and you shouldn't use them for shipping along with your product. SignTool.exe is the actual tool which will actually sign the assembly but the wizard/tool requires certain parameters as file which can be obtained by Certification Authority (CA), but that is a lengthy/costly process so you can you the above mentioned commands to understand how to digitally sign the assembly. Hope this post served the purpose of its title.
 Based on the command issued these tools help you do what you on the left hand side that is basically digitally signing the assembly. Things to remember here are that makecert.exe and cert2spc.exe are the tools that are shipped with .Net SDK and they are available merely for testing purpose and you shouldn't use them for shipping along with your product. SignTool.exe is the actual tool which will actually sign the assembly but the wizard/tool requires certain parameters as file which can be obtained by Certification Authority (CA), but that is a lengthy/costly process so you can you the above mentioned commands to understand how to digitally sign the assembly. Hope this post served the purpose of its title.
This article is valid for Visual Studio 2008 / .Net framework 3.5 /Windows XP (though OS over here is immaterial but I prefer to follow the practise)


